Setting Up a Stereo System with an X30/X36 Projector
Note
Please also read the Eye Safety topic before operating an X- or XR-Series projection module.
When your X-series projector was delivered without sensors you have to perform the following steps to set it up:
Note
The recommended torques are 2.4Nm for all M4 screws and 0.8Nm for all M3 screws.
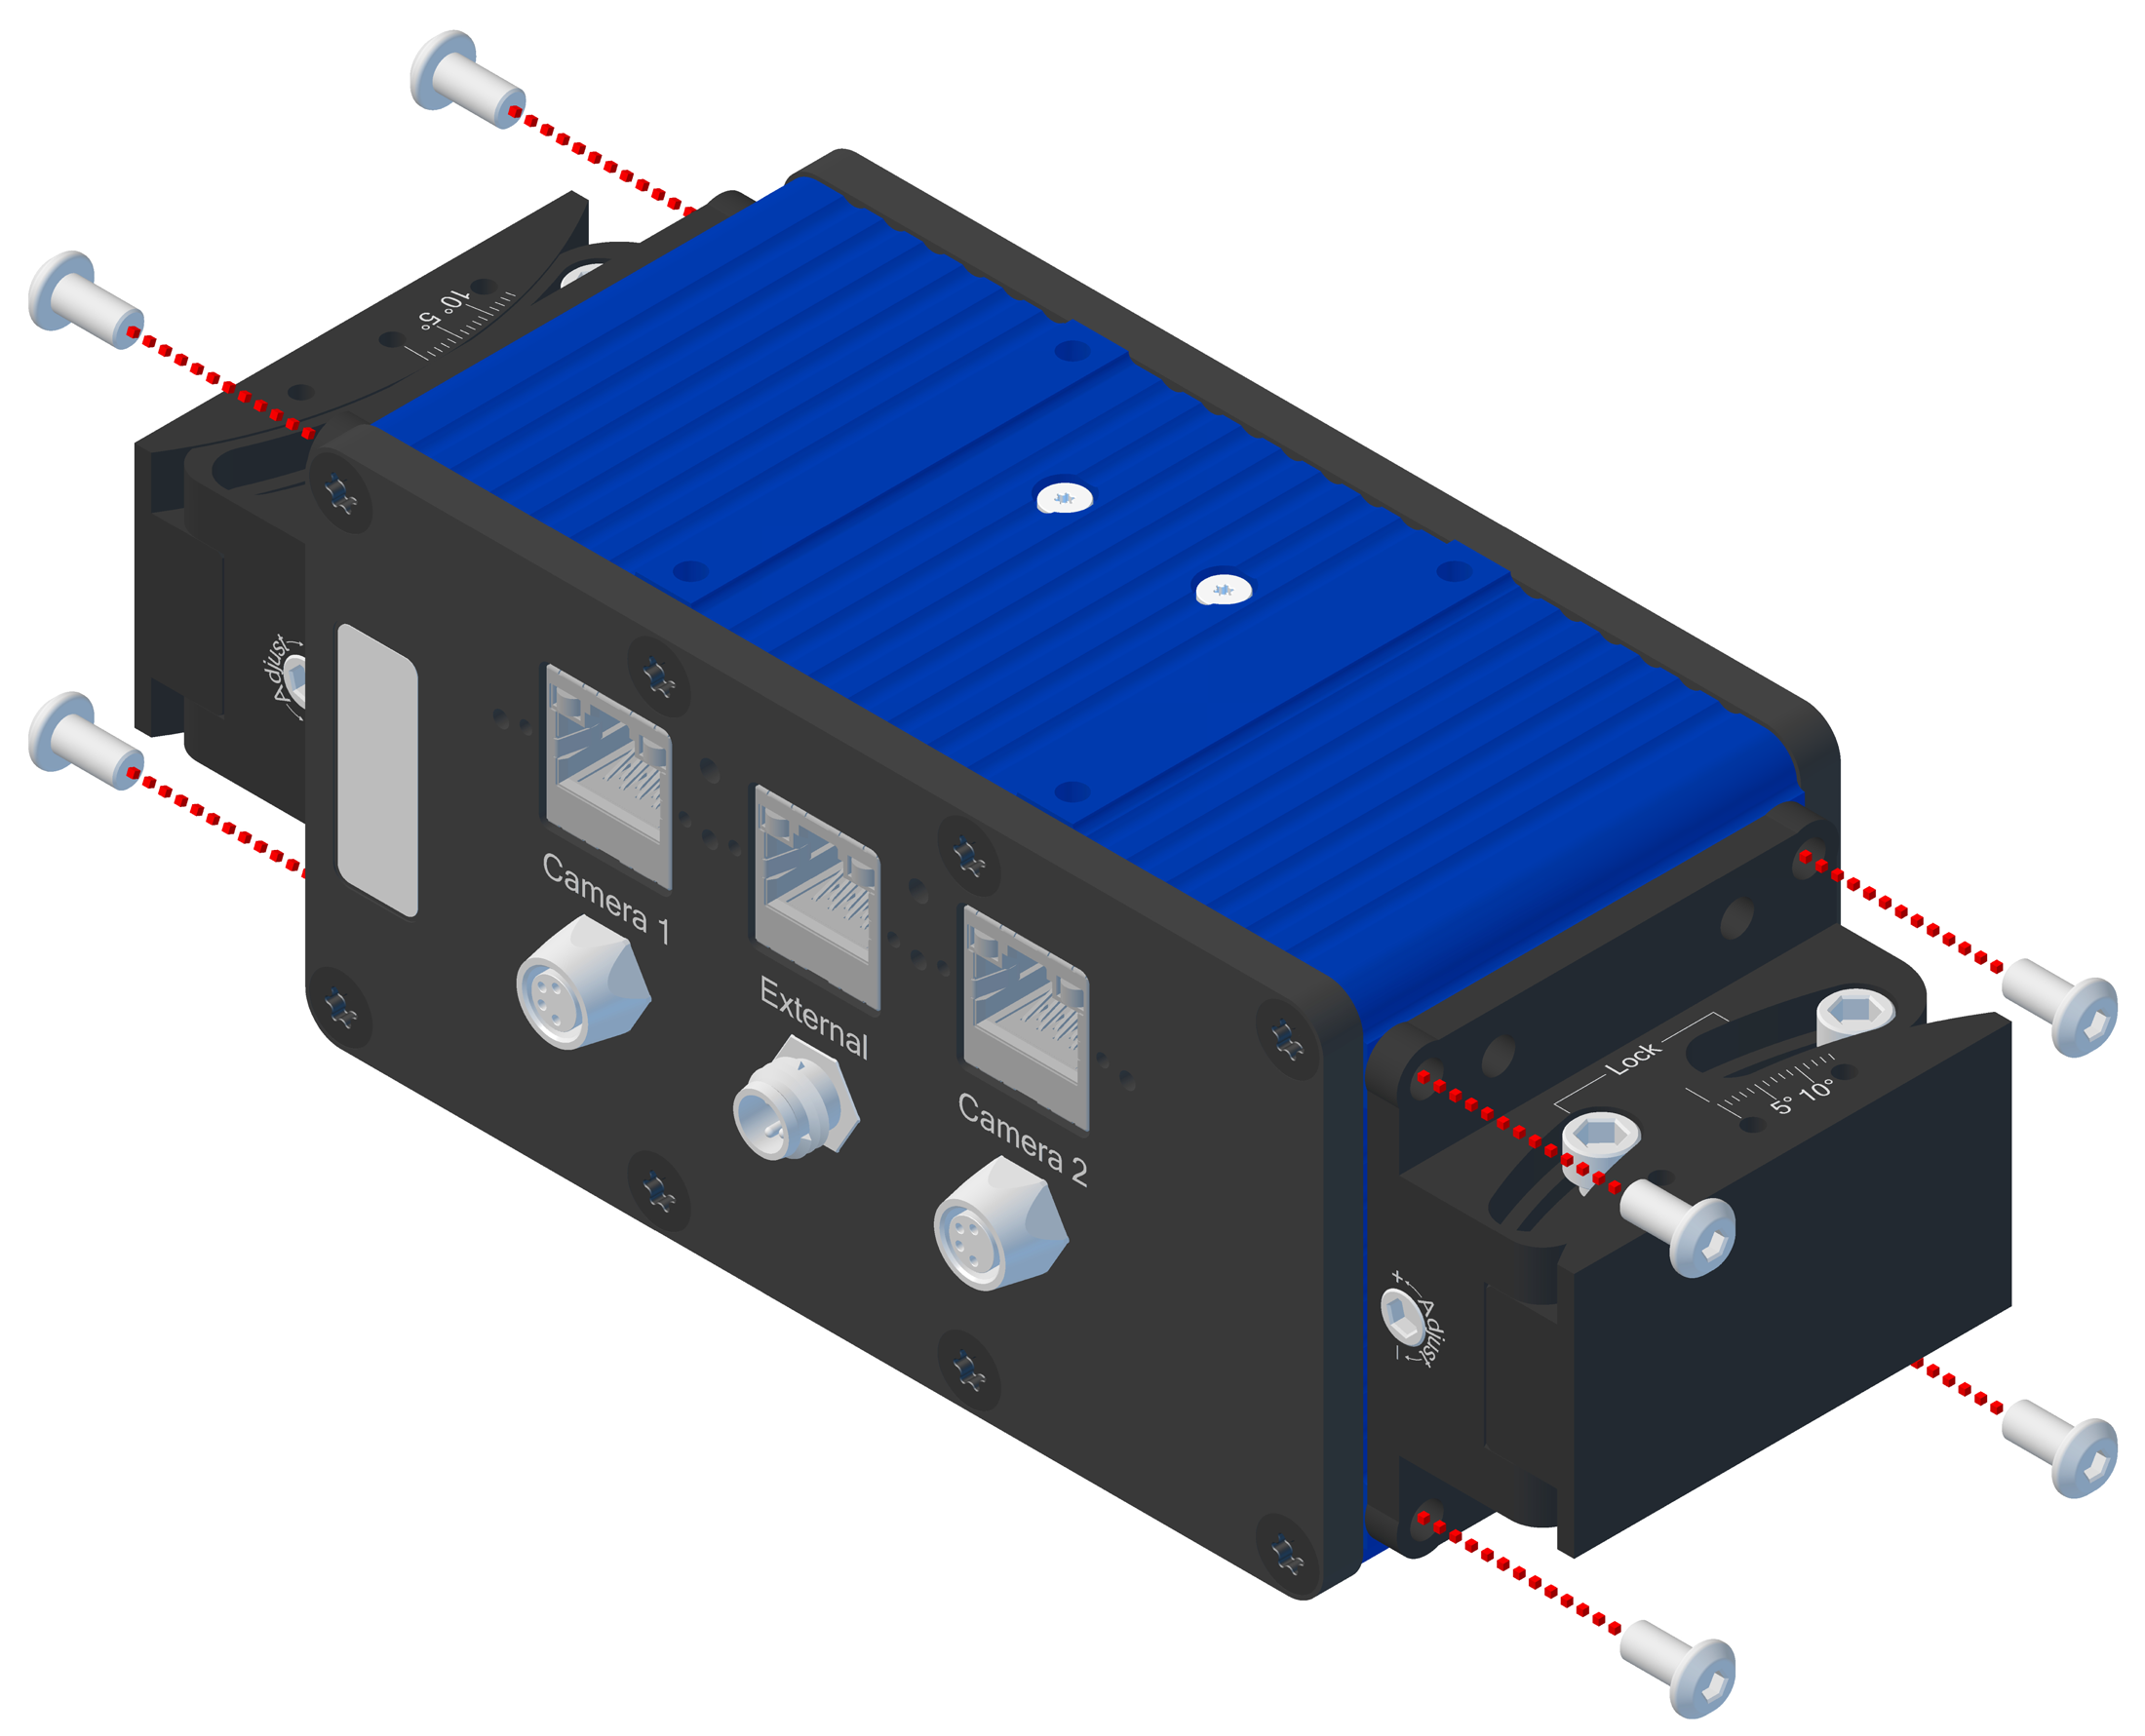
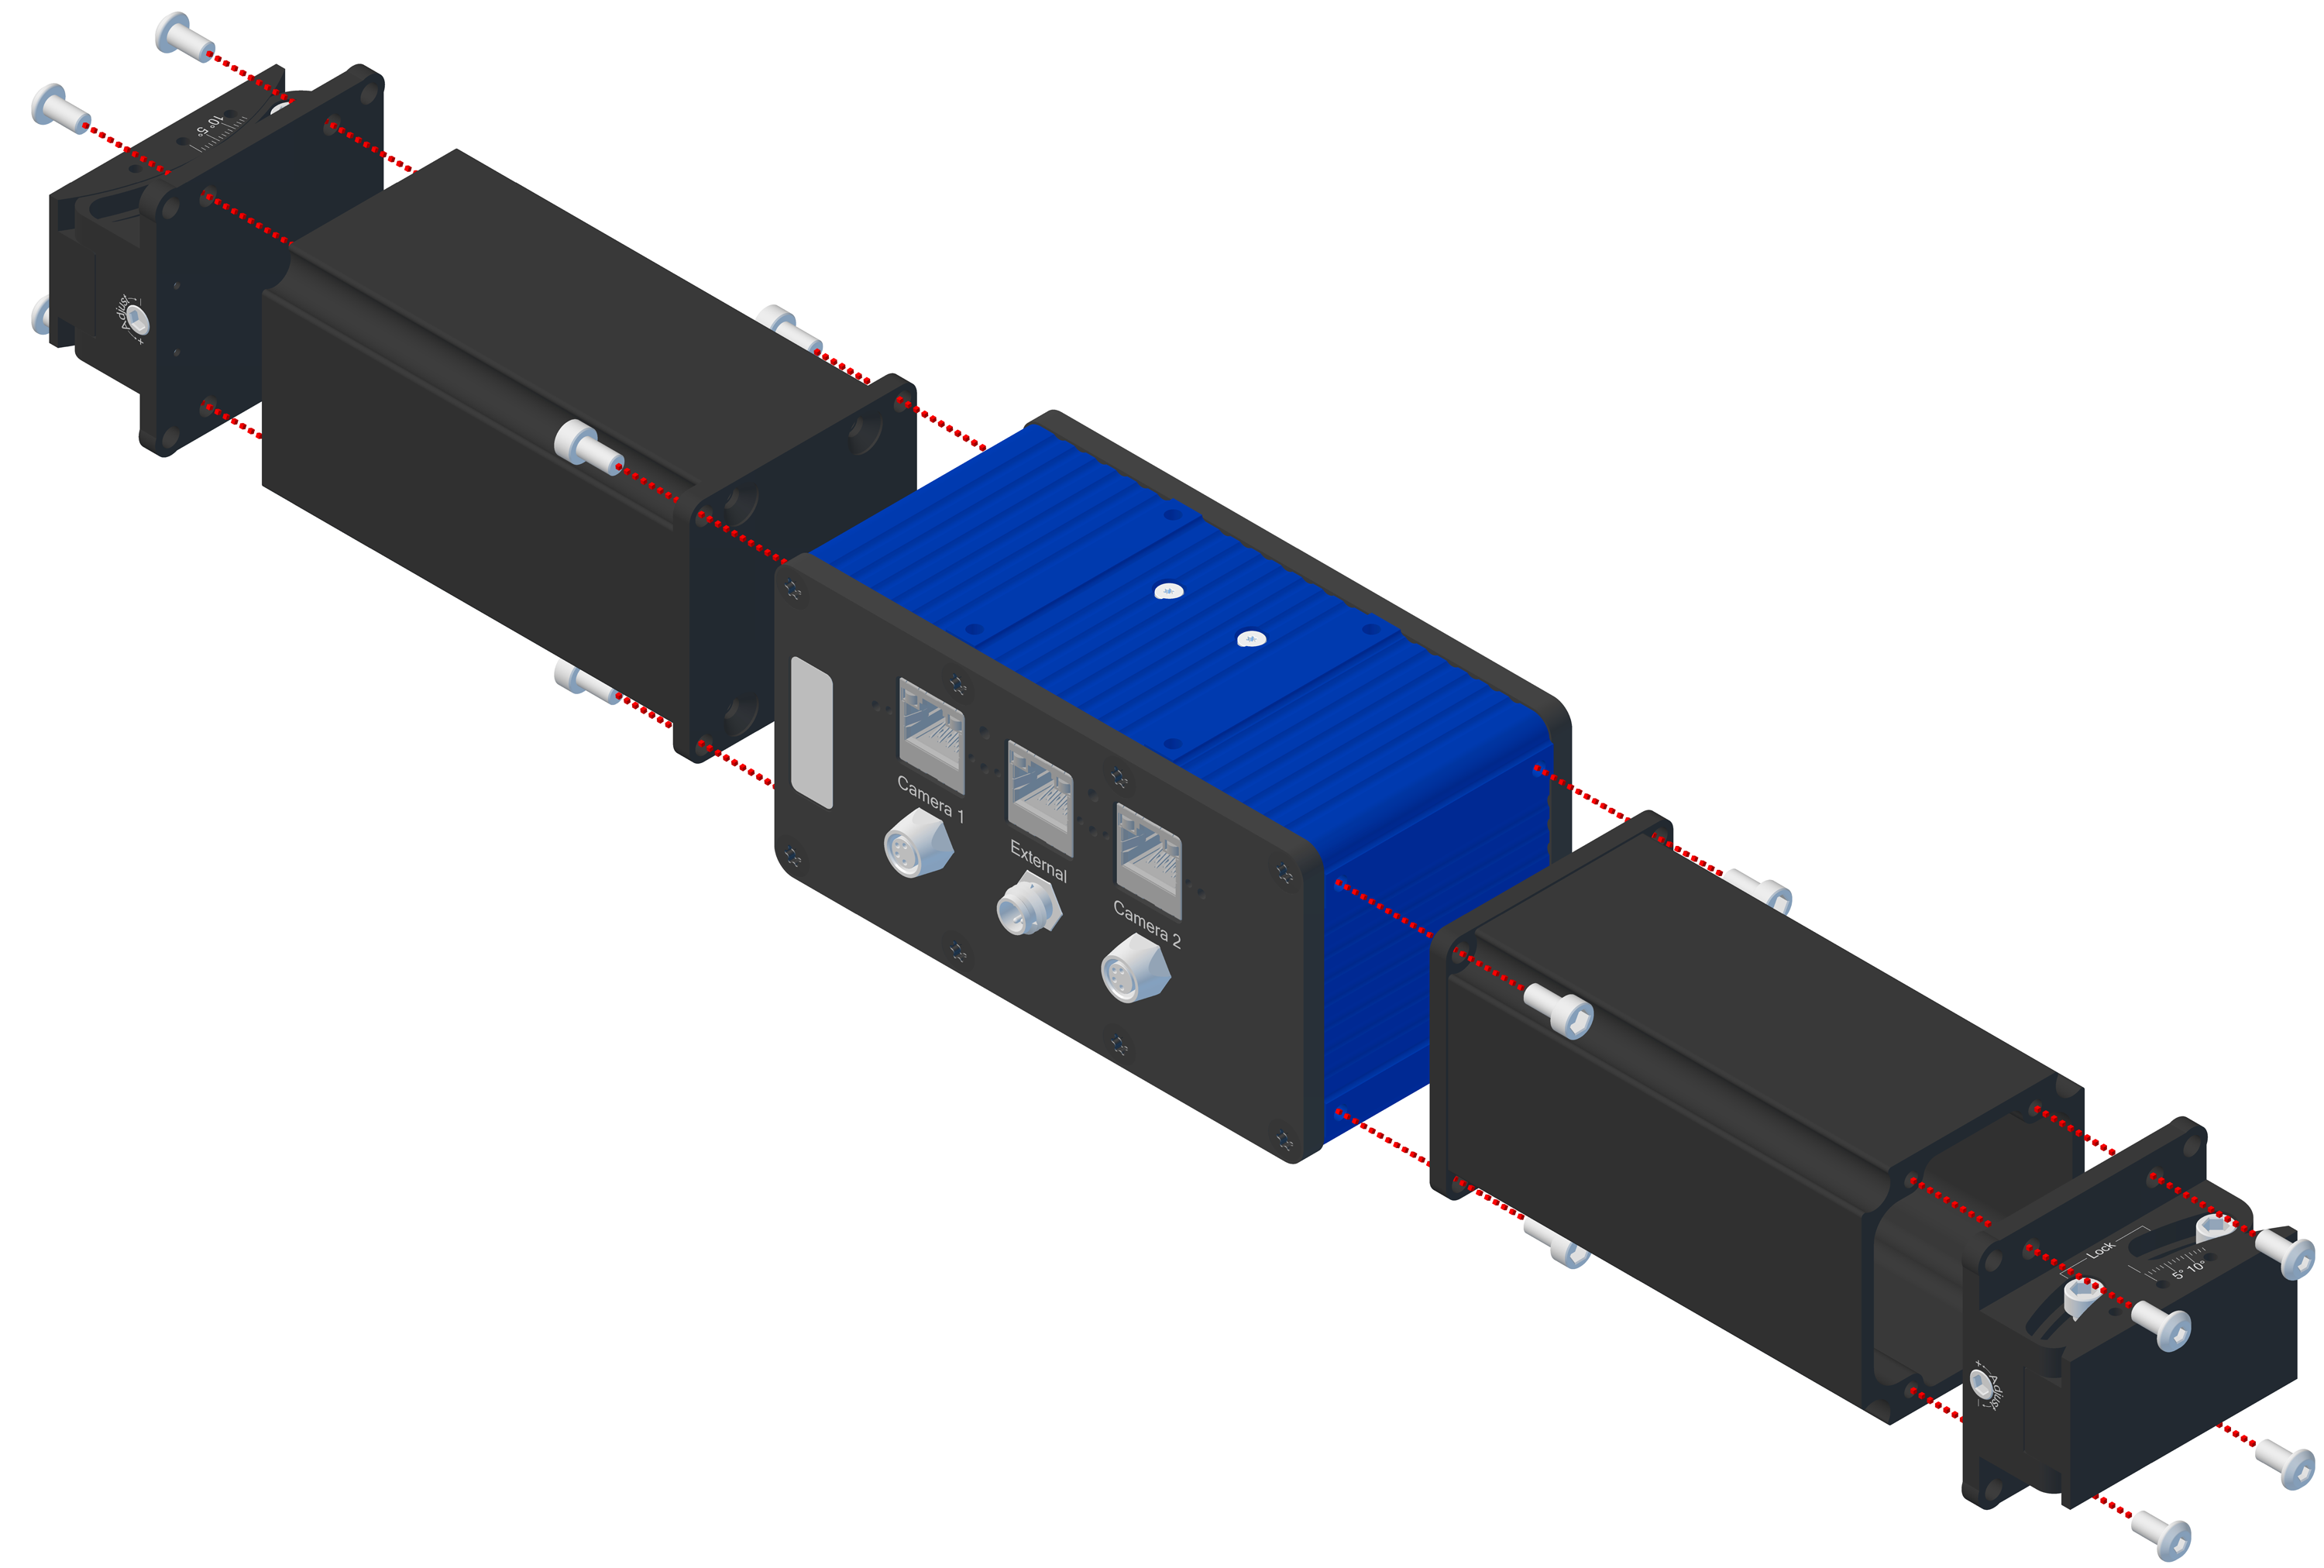
Attach goniometers and extension profiles to projection module (without/ with extruders).
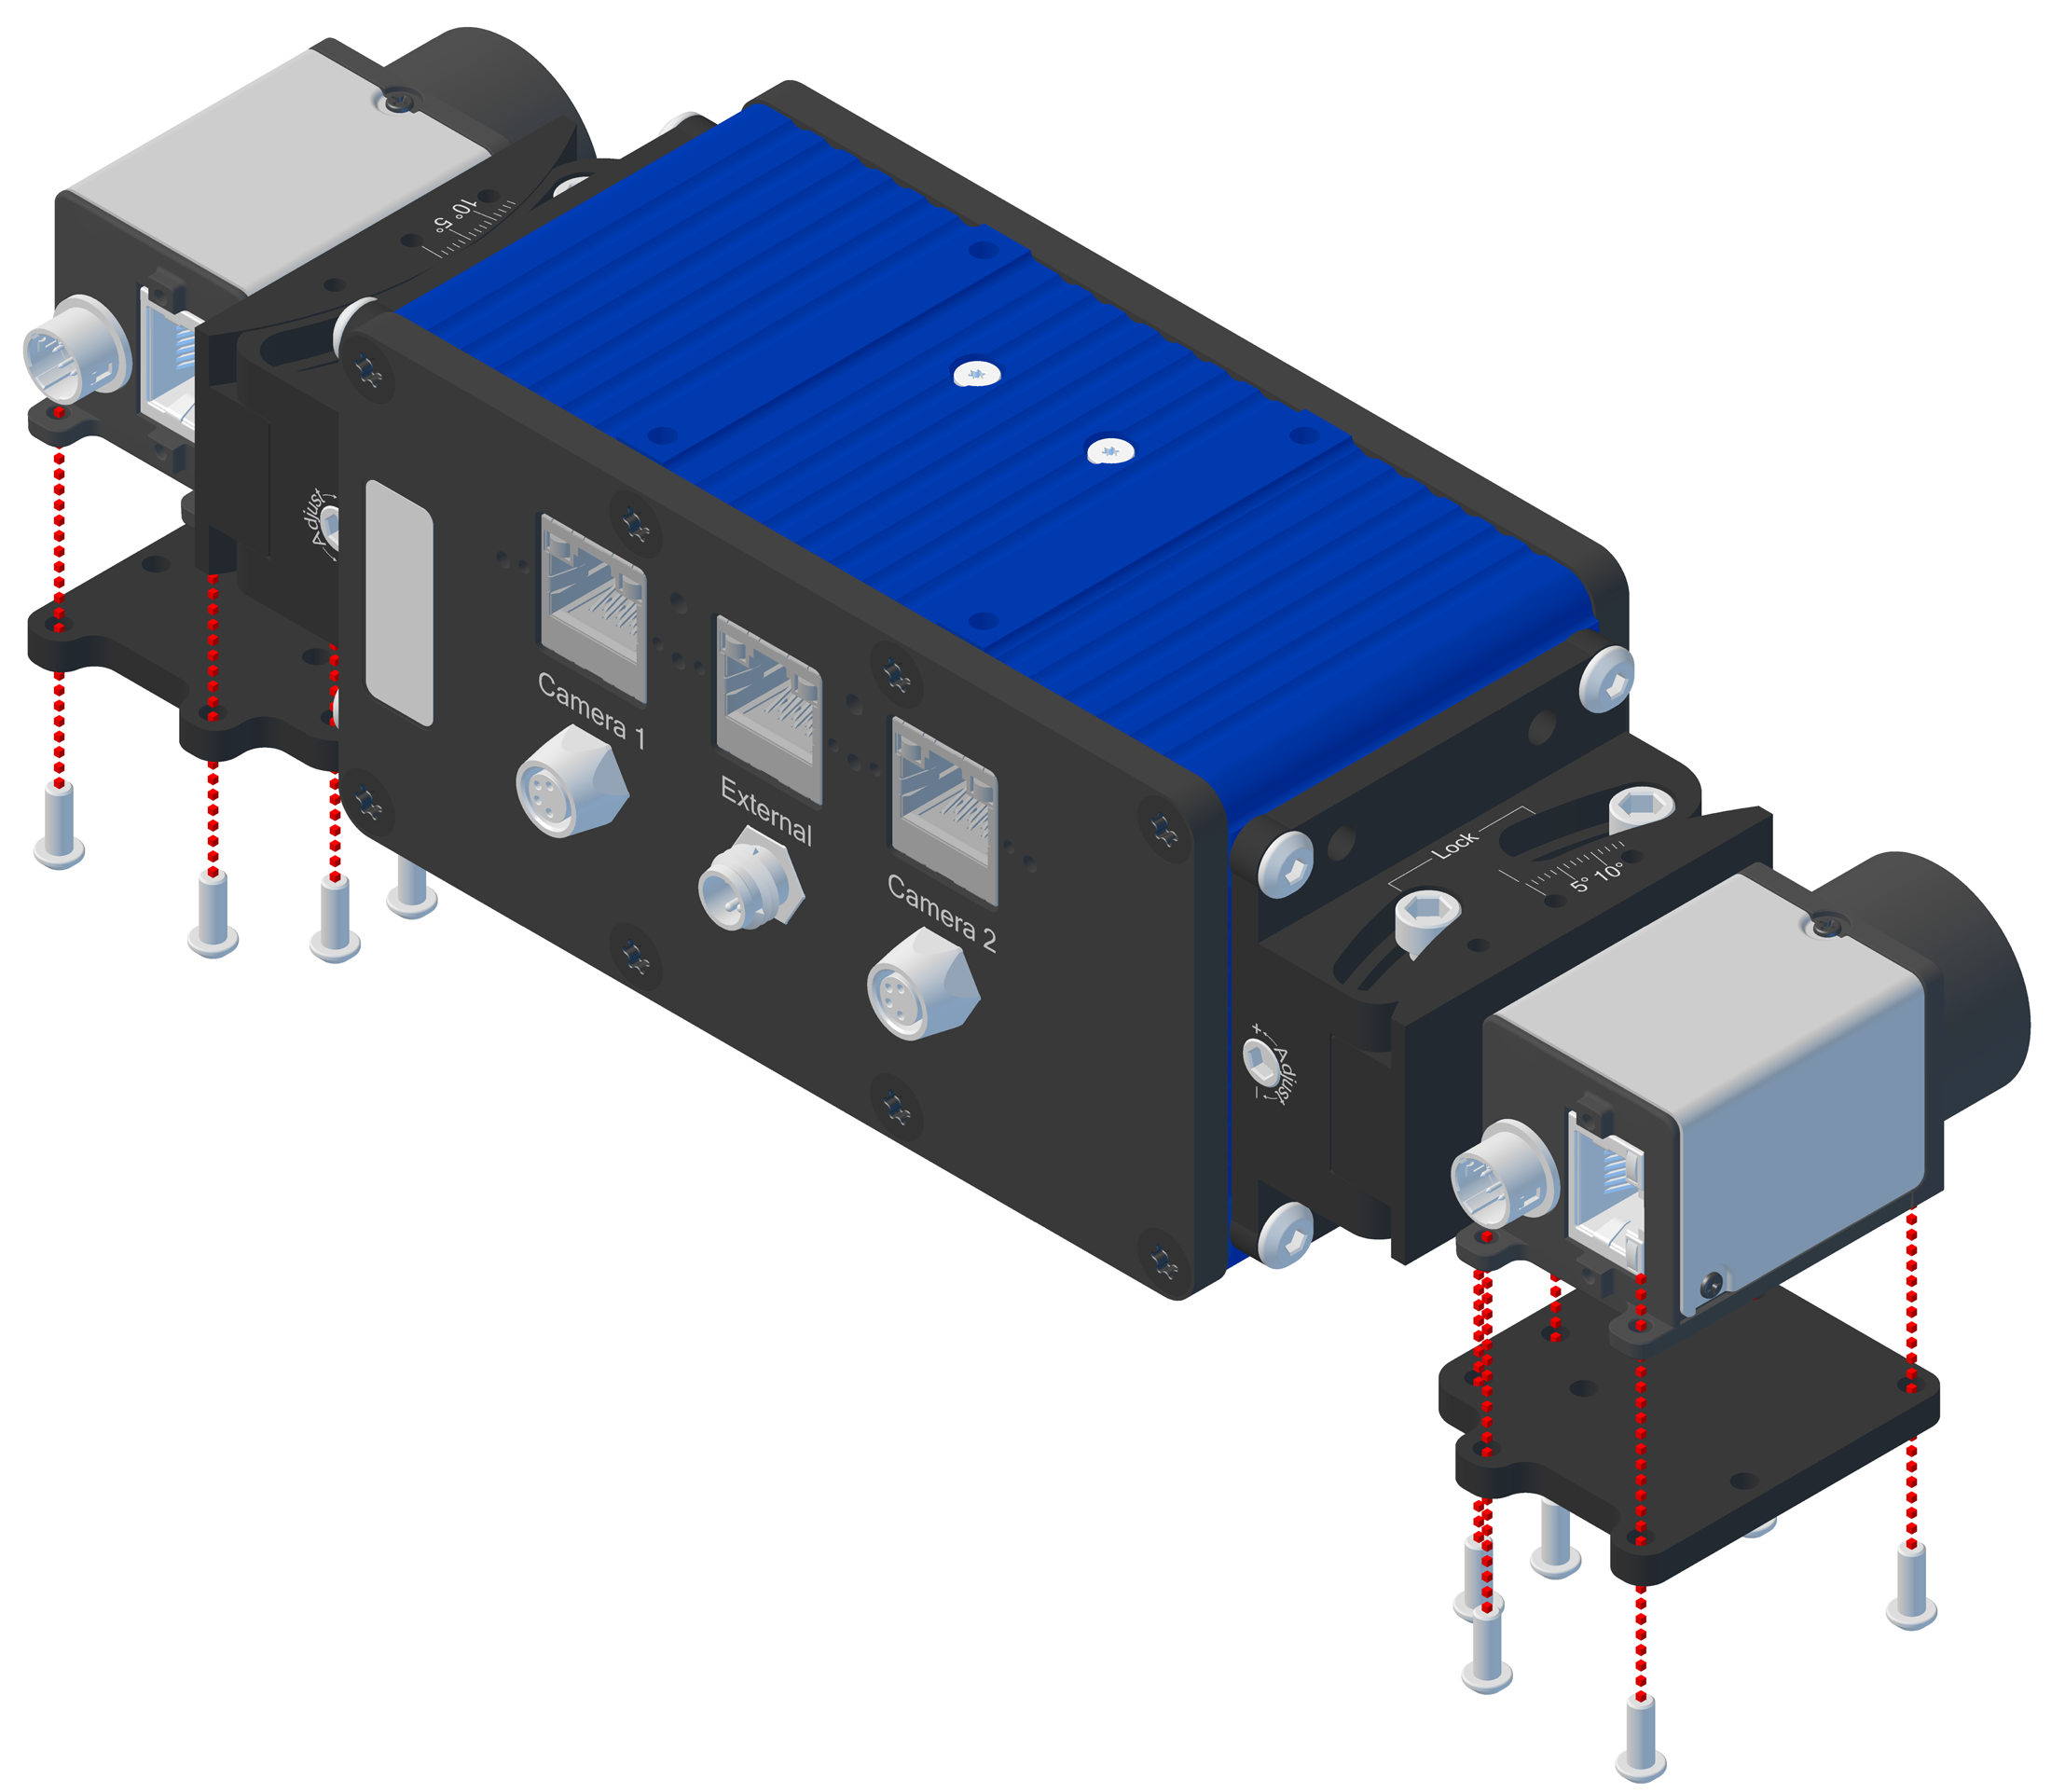
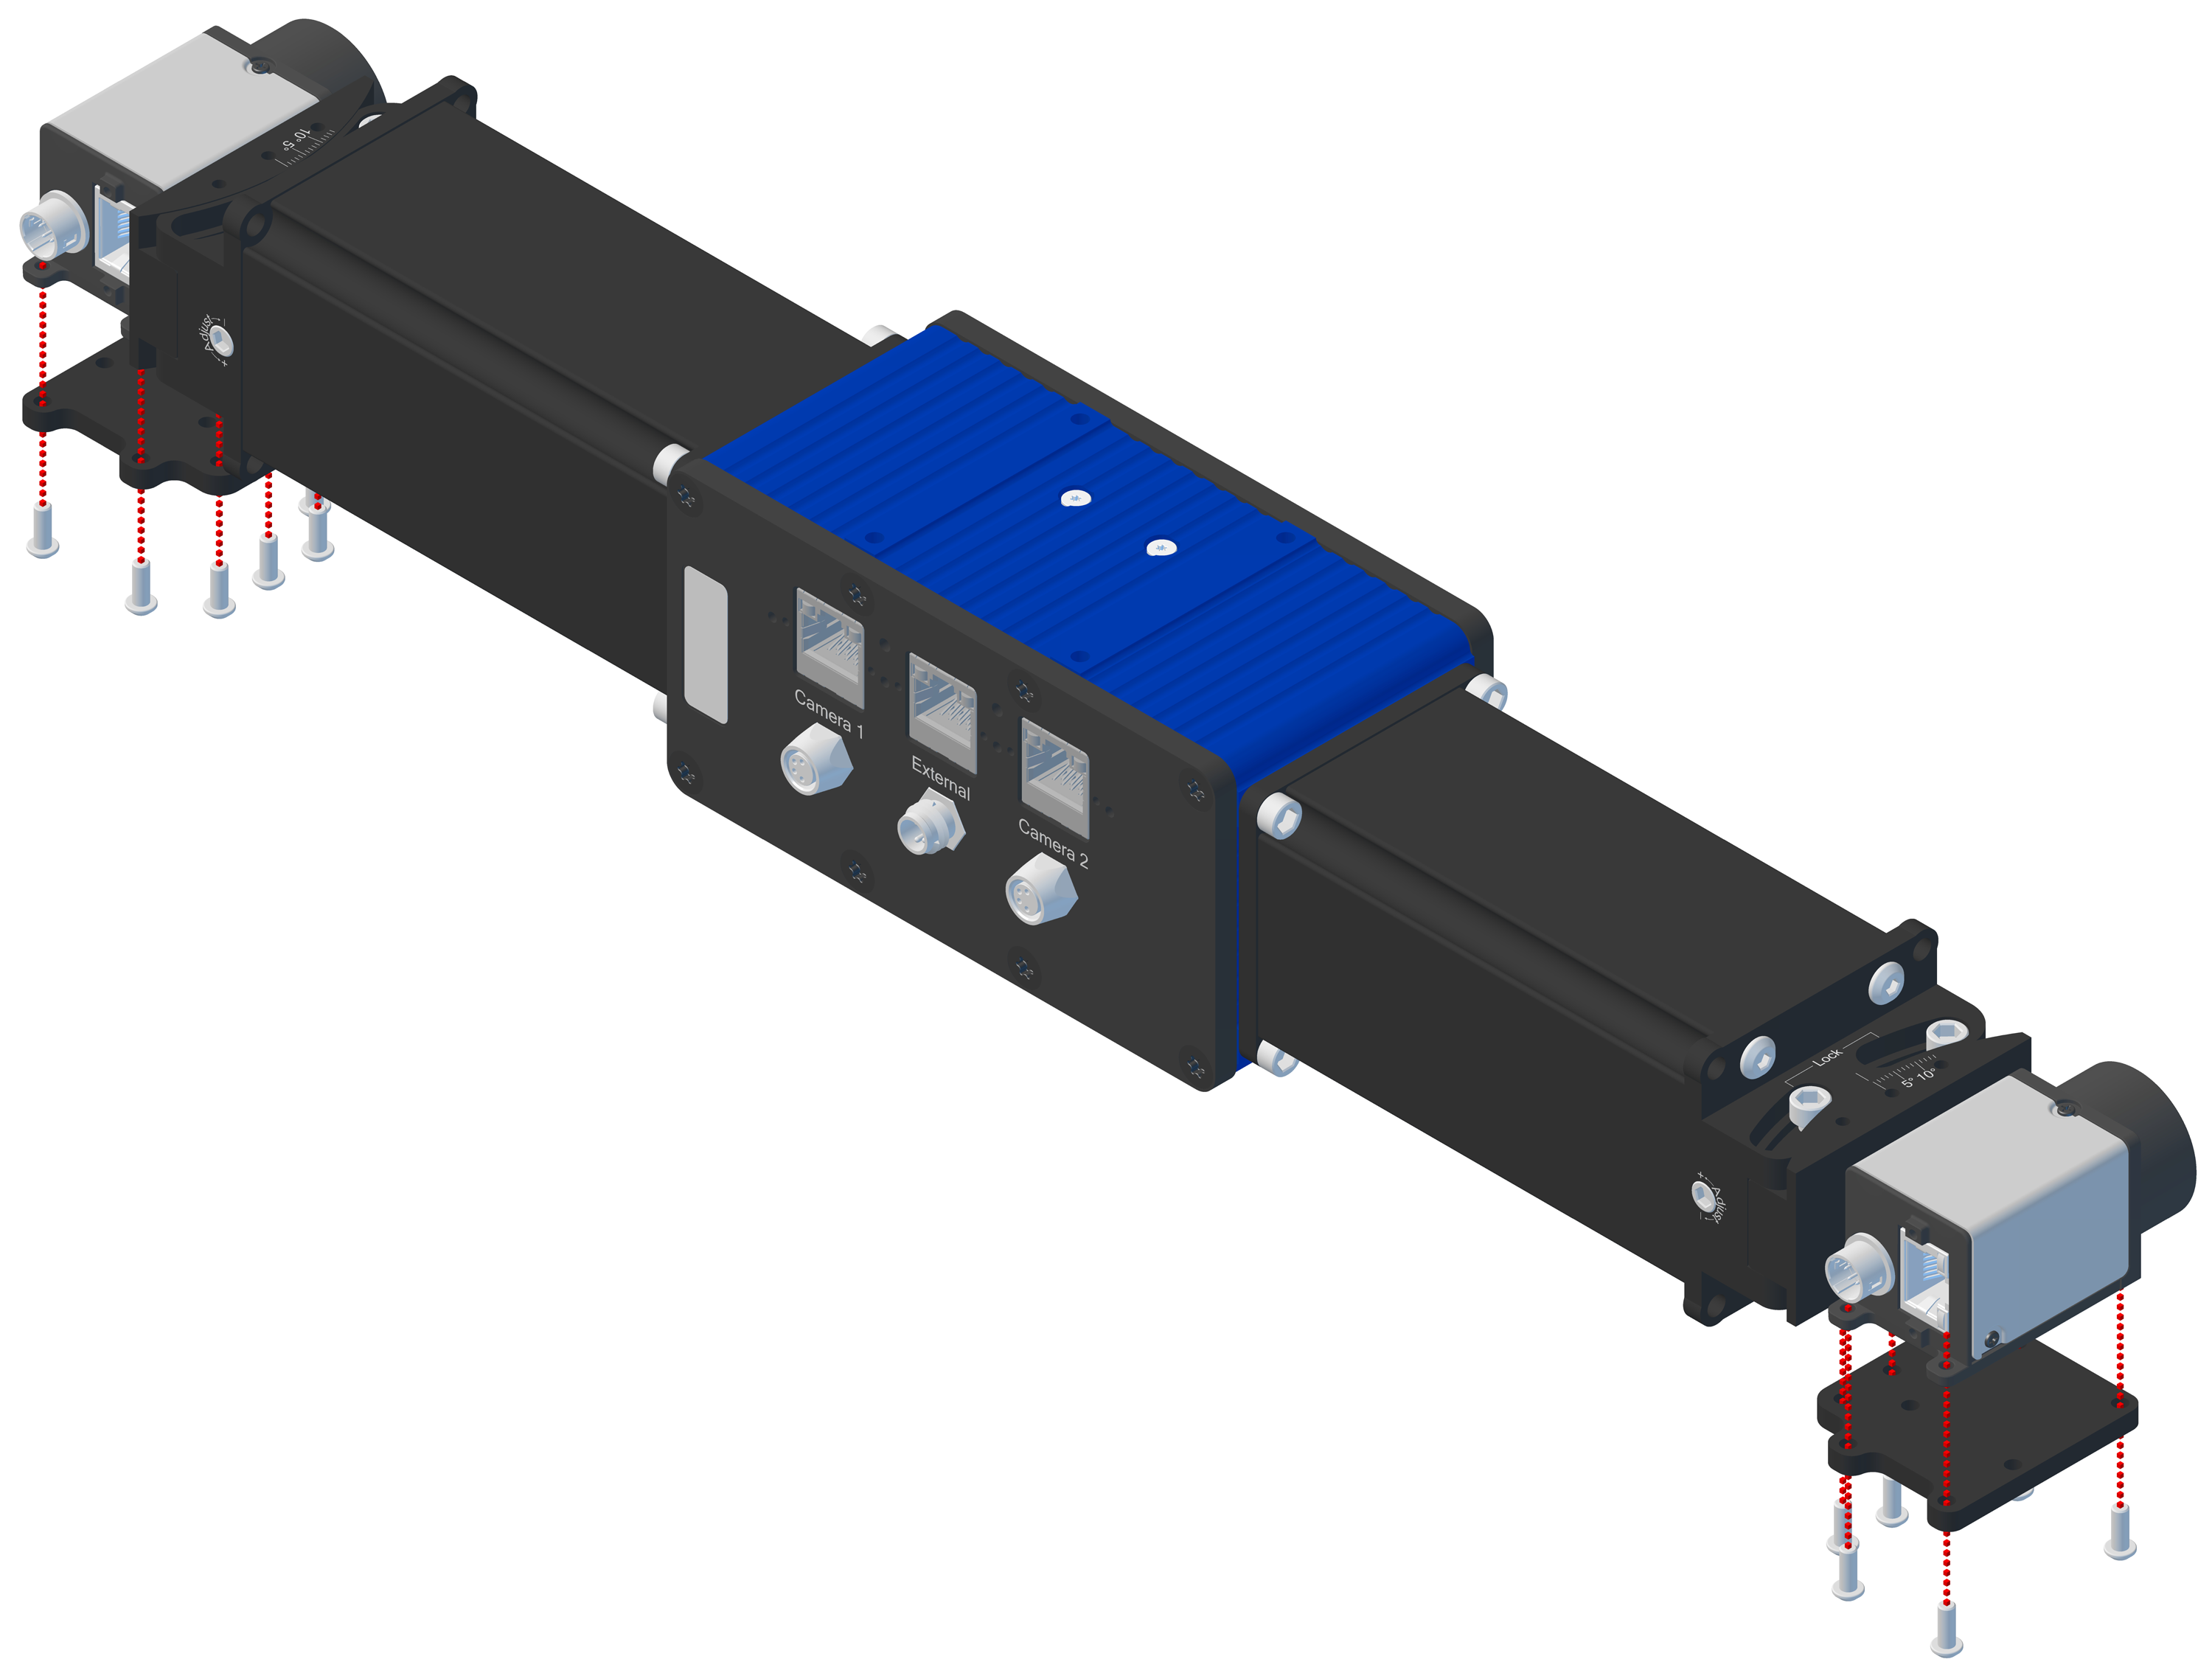
Mount uEye cameras on goniometers (without/ with extruders).
Connect GigE and synchronization cables on ‘Camera 1’ and ‘Camera 2’ GigE and GPIO ports.
Connect GigE and power supply cables to ‘External’ GPIO port of projection module.
Open NxView.
Create a stereo camera by pairing the projector with the corresponding sensors. - Select your projector and click on “Pair…” to open the pairing dialog. - Select the cameras that will become the left and right sensor of the stereo camera. Make sure that the trigger cables are connected to the projector.
Calibrate the stereo camera. - Select the stereo camera that was just created and click on “Calibrate…” . - Follow the instructions of the calibration wizard.
You camera is now ready and can be opened in NxView.
Note
If you want to use the same projector with different sensors later, you need to delete the old pairing first. This can be done in the context menu of the projector in NxView. You can then pair the projector with the new sensors by following the same steps as above.