Parameter Adjustment in NxView
This step-by-step procedure shall guide you to identify good stereo matching parameters for your respective scene. You can click the images on the right so see a larger screenshot or a short animation for each step.
1. Adjust Capture Settings
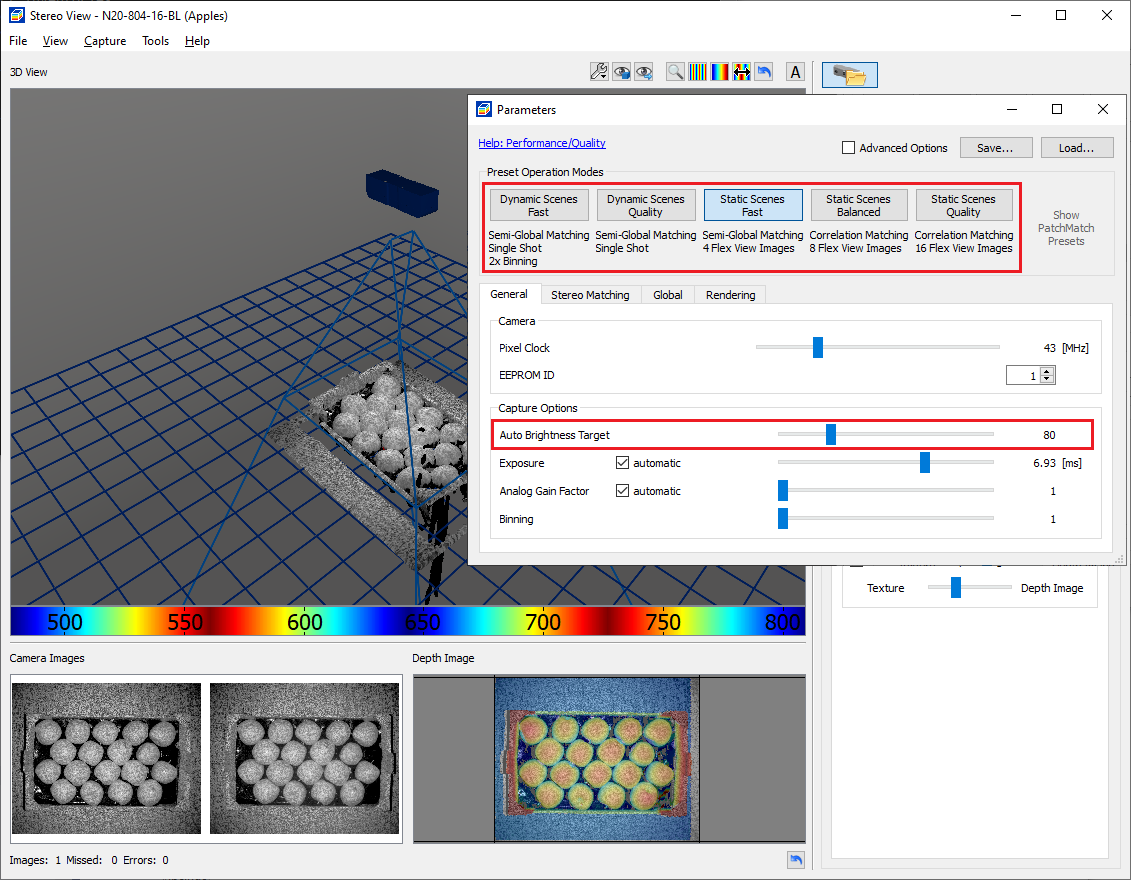
Open the NxView parameter dialog and switch to the General tab.
Adjust the target brightness value such that you get a high contrast of the projected pattern in the camera images.
It might be helpful to adjust the position or orientation of your camera or object in order to maximize projection contrast.
Reducing ambient light also helps to improve image contrast and thus data quality in later steps.
2. Select Quality Preset
Choose a settings preset according to your requirements. Use either a preset for static or dynamic scenes. Presets to the right provide increased data quality, presets to the left result in increased acquisition and processing speed.
Note
Very long exposure times may lead to variable illumination or trigger delays. Please also read the illumination topic for your camera model.
3. Enable Cuda
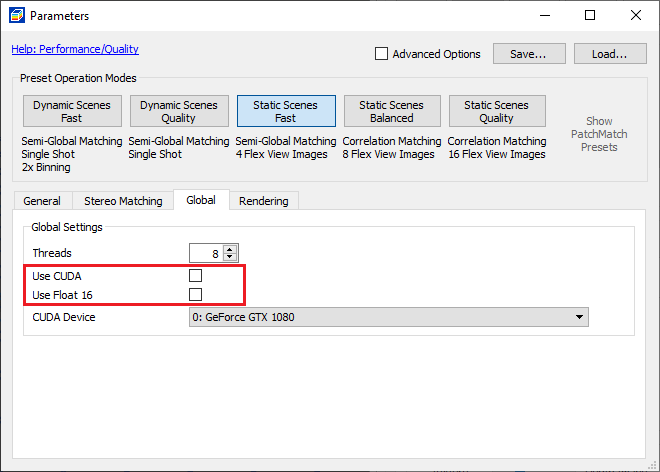
If your computer is equipped with a CUDA enabled graphics card you should check if using CUDA results in increased performance. You can enable CUDA on the Global tab of the parameter dialog. See this guide for more information.
4. Post Processing
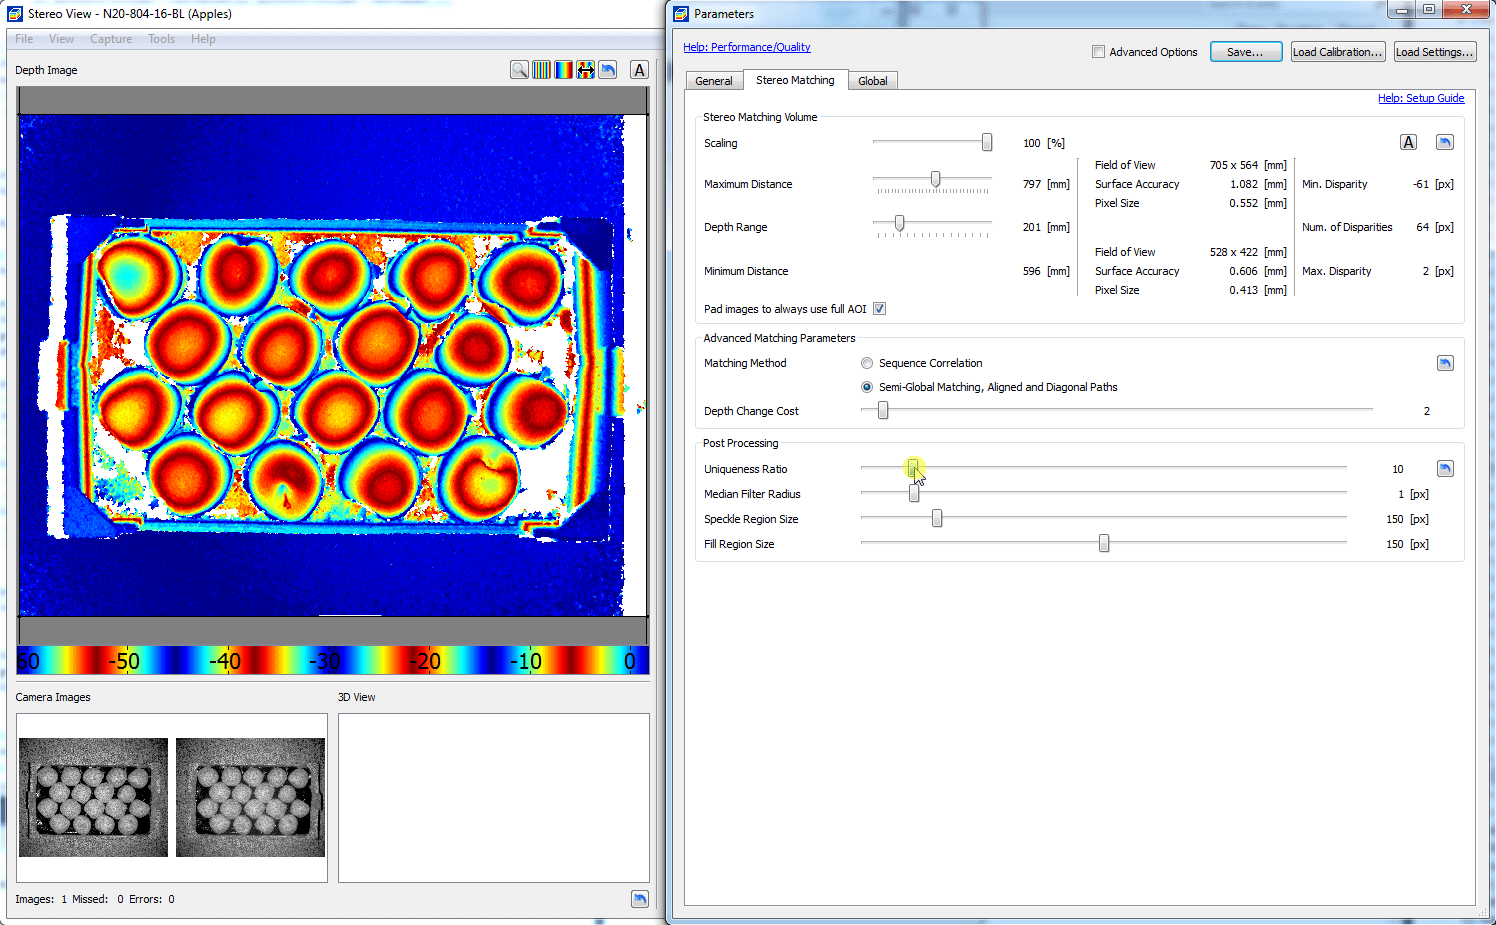
Turn all post processing options off.

Increase Uniqueness Ratio until interesting object parts start to get filtered.
Decrease Uniqueness Ratio until surfaces of interest begin to be complete again.

Increase Speckle Region Size to filter out small isolated areas.

(optional) Increase Filling Region Size to fill small gaps with constant Z-value. This is only recommended for visualization. When processing 3D data e.g. for searching CAD models filling should be switched off.
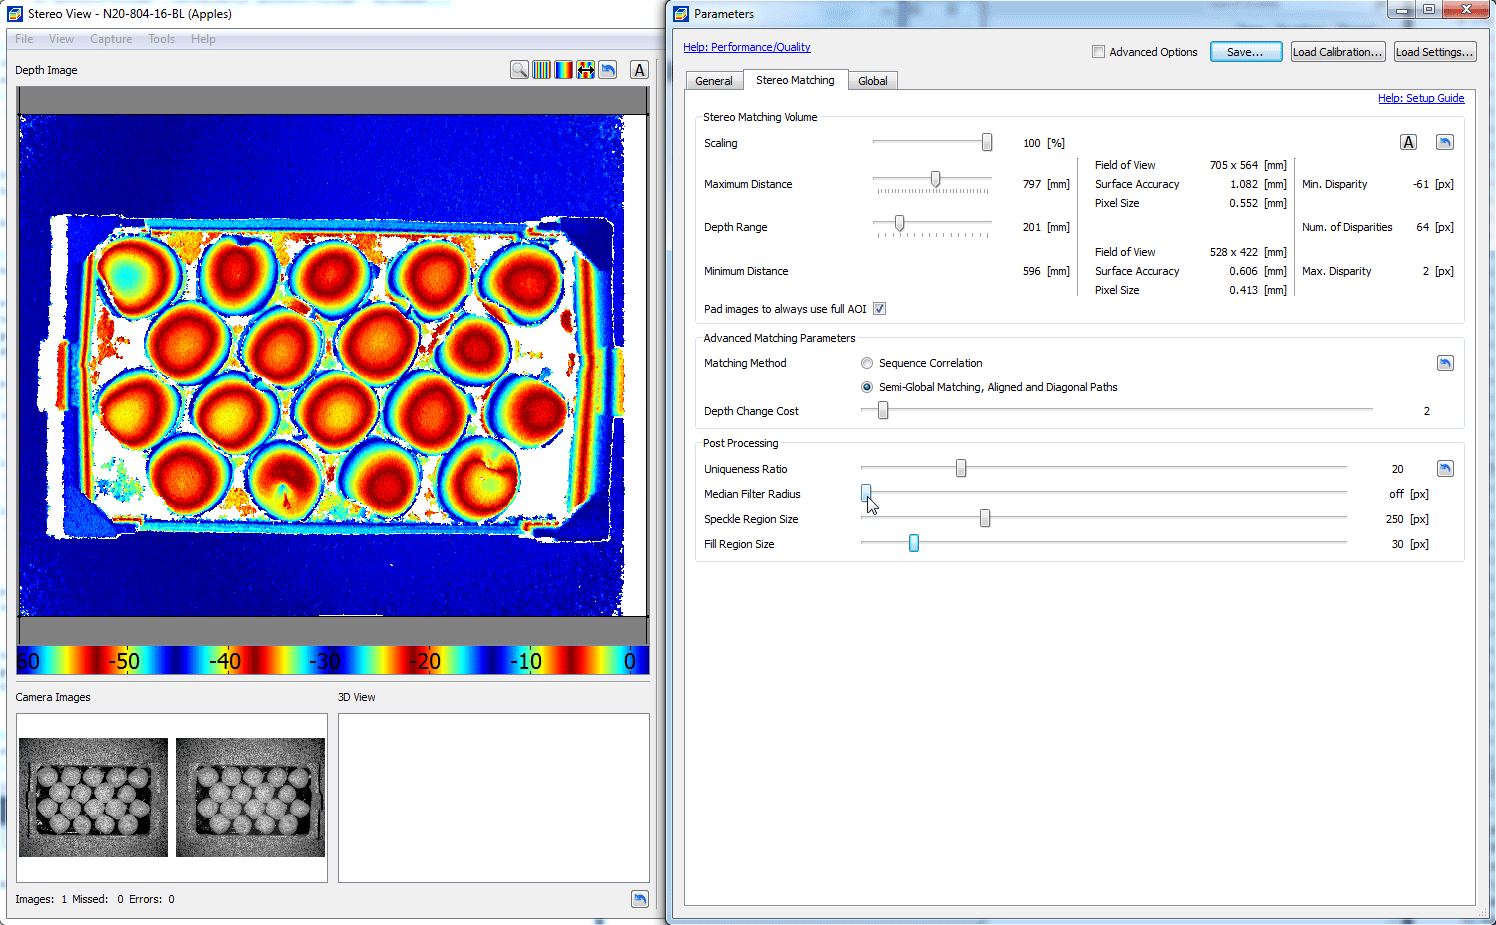
Increase Median Filter Radius to reduce noise while preserving sharp edges.
Decrease filter size again when important details start to get smoothed.